Here are technical quick steps on setup a brand new WordPress website using NGINX, PHP-FPM, LetsEncrypt and MariaDB. After following the step, you will have a website running in very cheap LightSail AWS ~ $5 / month.
Lets follow this 7 steps and just require less than 5 minutes!
- Go to AWS Lightsail and launch a new instance.
Go to https://lightsail.aws.amazon.com/ls/webapp/home/instances and launch a new instance. Create a static IP Address and attach into this instance. Then, you can assign the NS of domain into new IP address both www and non-www.
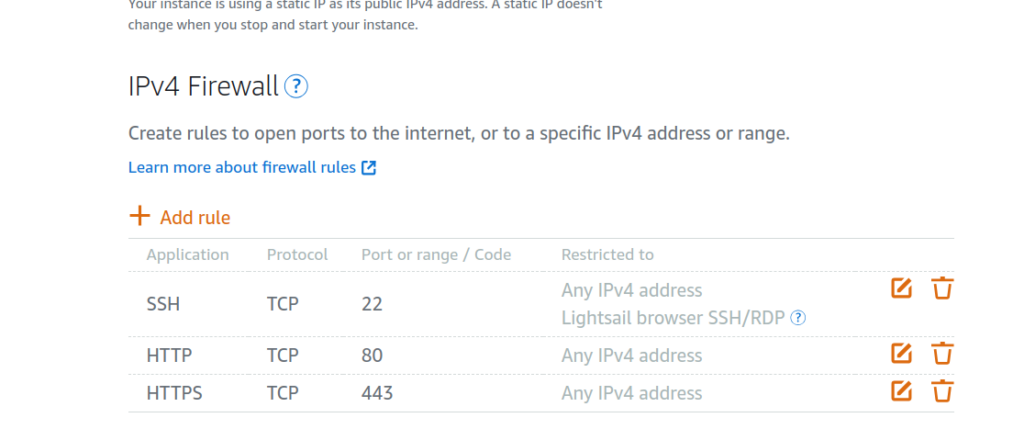
Then go to networking and enable “443” port to ensure HTTPS allowed from firewall.
- Install NGINX and pre-requisites library.
sudo apt update
sudo apt install nginx mariadb-server php php-fpm php-curl php-mysql php-gd php-mbstring php-xml php-imagick php-zip php-xmlrpc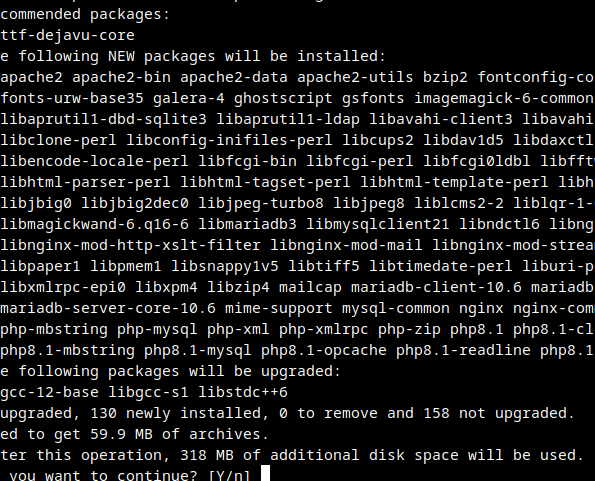
3. Setup MariaDB root password
sudo mysql_secure_installation

Enter current password for root (enter for none): N
Switch to unix_socket authentication [Y/n] n
Change the root password? [Y/n] Y
New password:
Re-enter new password:
Password updated successfully!
Remove anonymous users? [Y/n] Y
Disallow root login remotely? [Y/n] Y
Remove test database and access to it? [Y/n] Y
Reload privilege tables now? [Y/n] Y
4. Create database and Download latest WordPress
mysql -u root -p
create database <your-db-name>;
wget wordpress.org/latest.tar.gz
tar xvf latest.tar.gz
chmod +x wordpress
chmod 777 wordpress
sudo gpasswd -a www-data ubuntu5. Setup NGINX
Fixed the symbolic links, because NGINX will only serve settings in /etc/sites/enabled.
sudo rm -rf /etc/nginx/sites-enabled/
sudo ln -s /etc/nginx/sites-available/ /etc/nginx/sites-enabled
Create a new file in /etc/nginx/sites/enabled/yourdomain. Make sure to replace yourdomain.com and root path in this settings below
server {
    server_name yourdomain.com www.yourdomain.com;
    root /home/ubuntu/yourdomain;

    index index.php index.html;

    access_log /var/log/nginx/access.log;
    error_log /var/log/nginx/error.log;

    # Prevent access to hidden files
    location ~* /\.(?!well-known\/) {
        deny all;
    }

    # Prevent access to certain file extensions
    location ~\.(ini|log|conf)$ {
        deny all;
    }

    # Enable WordPress Permananent Links
    location / {
        try_files $uri $uri/ /index.php?$args;
    }

    location ~ \.php$ {
        include fastcgi_params;
        fastcgi_intercept_errors on;
        fastcgi_pass unix:/run/php/php8.1-fpm.sock;
        fastcgi_param SCRIPT_FILENAME $document_root$fastcgi_script_name;
    }
}
Try to restart NGINX and PHP-FPM services. You should able to see your domain rendered from this server. If you encounter with `File not Found` then follow this tutorial to fix it https://www.yodiw.com/solve-wordpress-nginx-13-permission-denied/
6. Setup LetsEncrypt For SSL
sudo snap install --classic certbot
sudo ln -s /snap/bin/certbot /usr/bin/certbot
sudo certbot --nginx
Enter email address:
Select all options shown (Enter 'c' to cancel): 2,1
Successfully received certificate.
Deploying certificate
Congratulations! You have successfully enabled HTTPS!7. Modify NGINX to Redirect HTTP to HTTPS and NON-WWW to WWW address
To enforce it, you can modify the nginx, see on the first-two server {} configuration
server {
    if ($host = www.yourdomain.com) {
        return 301 https://$host$request_uri;
    } # managed by Certbot

    if ($host = yourdomain.com) {
        return 301 https://$host$request_uri;
    } # managed by Certbot

    server_name yourdomain.com www.yourdomain.com;
    listen 80;
    listen [::]:80;

    return 301 https://$host$request_uri;
}

server { #Redirect https, non-www to https, www
    listen [::]:443 ssl; # managed by Certbot
    listen 443 ssl; # managed by Certbot

    server_name yourdomain.com;
    ssl_certificate /etc/letsencrypt/live/yourdomain.com/fullchain.pem; # managed by Certbot
    ssl_certificate_key /etc/letsencrypt/live/yourdomain.com/privkey.pem; # managed by Certbot

    return 301 https://www.yourdomain.com$request_uri;
}

server {
    server_name www.yourdomain.com;
    root /home/ubuntu/yourdomain;

    index index.php index.html;

    .....
}
8. Completed!
Yes, now you able to login into your WordPress and do installation. Congratulations and have a nice day!